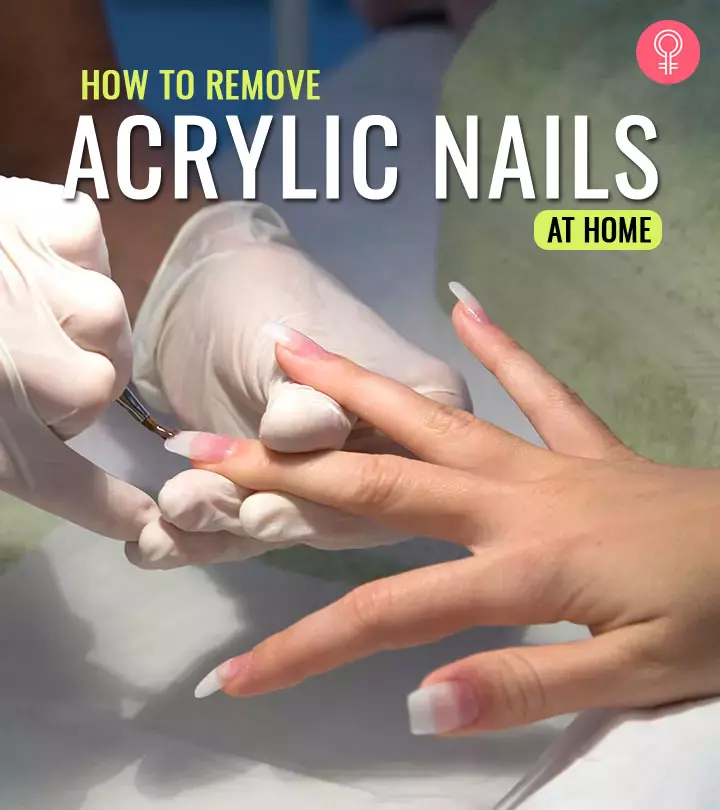
How To Remove Acrylic Nails At Home Easily – Tips To Follow
Save yourself that expensive trip to the salon by safely removing acrylic nails at home.

While applying acrylic nails is an easy idea to glamorize your look by adding length to your nails, removing them can be quite cumbersome.
However, knowing how to remove acrylic nails can make the whole process less painful. Ideally, we suggest getting it done by professionals at a nail salon, but if time and money are constraints for you, there are a few easy steps to do it at home, too. In this article, we show you the most convenient ways to remove acrylic nails at home. Keep scrolling!
In This Article
How To Remove Acrylic Nails Safely At Home
Acetone is your best savior when it comes to removing acrylic nails at home. This strong liquid-based chemical dissolves the acrylic nails and helps you remove them easily. You must be wondering how such a strong ingredient can be safe on your skin. Acetone should not come in contact with your skin very often, but apart from a little dryness, and in some rare cases, a slight redness, it is relatively safe for use. Make sure to take the necessary safety measures, and you will be fine. If you want to know more about how to soak off acrylic nails, check out this video.
How To Remove Acrylic Nails With An Acetone Soak-Off
Here are a few methods that you can try to take off acrylic nails expertly using acetone.
Method 1 – How To Take Off Acrylic Nails Using Acetone And Warm Water

The first method involves dipping your nails in acetone. Here’s how to do it.
Things You Will Need
- Acetone
- Orange sticks
- Petroleum jelly
- Nail clippers
- Warm water
- Tweezers
- Two bowls
Step By Step Process
- Clip your nails as short as possible and pry your cuticles with the orange stick.
- Fill up one bowl with acetone and another one with warm water, and put the bowl containing acetone inside the warm water bowl to warm it up gently.
- Apply a generous amount of petroleum jelly on the skin surrounding your cuticles. This will protect them from the harsh, drying effects of acetone.
- Now, dip the entire length of your nails in the bowl containing acetone and wait for 30-40 minutes.
- Check if the acrylic nails have gone soft, and you should be able to pull them out gently with tweezers. If you feel resistance, do not yank, just soak them in acetone for some more time.
Method 2 – How To Remove Acrylic Nails Using Acetone And Aluminum Foil

- Acetone
- Nail clippers
- Nail buffer or file
- Cotton balls or pads
- Aluminum foils
- Petroleum jelly
Step By Step Process
- Clip the acrylic nails as short as possible
- File away the topcoat, nail polish, or any color to avoid creating a mess or get your hands full of color.
- Apply petroleum jelly on the skin surrounding the cuticles. Now, soak the cotton pads in acetone and place it on your nails.
- Tear a piece of aluminum and wrap it over the cotton pad or ball so that it stays in place.
- Wait for 25-30 minutes.
- Pull the aluminum foil gently, and the acrylic nail should come off with it. If you feel resistance, keep it wrapped for some more time.
Check out this video to know more about how to take off acrylics using this method:
Method 3 – How To Remove Acrylic Nails With Acetone And Plastic Bags
While it may not be environment-friendly, this is an easy way to remove your acrylic nails without much trouble.
Things You Will Need
- Nail clippers
- Acetone
- A large ziplock bag
- Wooden cuticle stick
- Nail buffer
Step By Step Process
- Clip your acrylic nails as short as possible. Be careful not to snip off your real nails.
- Take a large ziplock bag and fill it with just enough acetone to submerge your nails fully.
- Tilt the bag to one side so that the acetone collects in one corner.
- Stick your hand inside the bag and let your nails soak in the acetone for 15-20 minutes.
- After 20 minutes, try scraping off the acrylics gently using a wooden cuticle stick.
- If you feel resistance, soak them again for 5 minutes and repeat the process.
- Use a soft foam buffer to get rid of leftover residue.
If you have sensitive skin or want to avoid using harsh products like acetone, you can try out methods that use everyday items to remove fake nails, instead of acetone. Check them out below.
How To Remove Acrylic Nails Without Acetone
Method 1 – Removal Of Acrylic Nails Using Acetone-Free Nail Polish

It will take a little time, but if you plan to avoid acetone, your regular nail polish can also help you get acrylics off.
Things You Will Need
- Acetone-free nail polish remover
- Tweezer
- Bowl
- Nail clippers
Step by Step Process
- Clip the acrylic nails as short as possible.
- Pry the edges with the pointy end of the tweezers.
- Pour acetone-free nail polish remover in a bowl.
- Soak the nails in the nail polish remover for 30-40 minutes.
- Once you feel the nail loosened, pull it out gently with tweezers. If it does not come out easily, soak for some more time.
Quick Tip: Normal acetone-free nail polish remover tends to evaporate after some time. Hence,keep adding nail polish remover from time to time.
Method 2 – How To Remove Acrylic Nails With An Electric File/Nail Bit

Shutterstock
This method requires some great skills and is preferred by professionals and. But there is no reason you cannot master this method at home. Let us show you how.
Things You Will Need
- Electric nail file
- Acetone
- Cotton balls
- Tinfoil
- Cuticle pusher
- Cuticle oil
Step by Step Process
- Use the nail file to sand down the acrylics carefully. Be extremely gentle as you take off the top layer of your acrylic nails.
- Soak a cotton pad with acetone and wrap it around each nail.
- Wrap the cotton pad with tinfoil and cover it completely.
- Wait for 10-15 minutes before unwrapping the foil and removing the cotton.
- Use a cuticle pusher to remove the excess acrylic on your nails.
- Rinse your hands thoroughly with soap and water.
- Use cuticle oil to moisturize your nails and cuticles after the treatment.
Quick Tip: An electric nail file requires practice and precision for expert handling. Ensure you are equipped to handle this method on your own, or you might damage your natural nails.
Method 3 – How To Remove Acrylic Nails Using Nail Filers

Another way of getting rid of acrylic nails is to file them away. It can be time-consuming, but your skin does not come in contact with chemicals.
Things You Will Need
- Nail filer or buffer
- Orange sticks
- Nail clippers
- Cuticle scissors
- Cuticle oil
Step By Step Process
- Remove the color and design from nails and clip them to the shortest length possible.
- Start filing them using long strokes. Keep filing until you have reached the nail bed. Be careful and stop before you file off your actual bed.
- If you notice some of it remaining on your nails, take a cuticle scissor and pry open the edges and clip it. Make sure to cut only small pieces at a time and not try to pry open too much.
- Once all the acrylic nail is off, take the orange stick and scrape off the acrylic glue.
Quick Tip: This procedure can be a little harsh on your nails, follow it up with cuticle oil.
Method 4: How To Take Off Acrylic Nails With Hot Water (Without Acetone)

This is one of the easiest and gentlest methods to soak off acrylic nails. It is also the safest method.
Things You Will Need
- Warm water
- Nail filer
- Orange sticks
- Nail clipper
Step By Step Process
- Trim the nail to the shortest length possible and pry the edges with the stick.
- Pour warm water into a bowl. Make sure the temperature is comfortable as you have to soak for long.
- Soak your nails in the warm water for at least 30-40 minutes todissolve the glue. Dip at an angle where the warm water can seep through the inlet you made with your orange stick.
- If the nails do not come out, add warm water, and soak for some more time.
Quick Tip: As you have to soak for long, the water will start getting cold. Keep pouring warm water now and then to maintain a constant warm temperature. Take a look at this video to know more.
Method 5 – How To Remove Acrylic Nails Using Dental Floss

Head to your bathroom closet and get your dental floss out. Apart from your oral hygiene, these strong threads are an excellent way of removing acrylic nails. However, this cannot be done by you alone, so make sure you have someone to help you out with it.
Things You Will Need
- Orange sticks
- Dental floss
- A partner
Step By Step Process
- Pry your cuticles with the orange sticks to make a little inlet.
- Ask your partner to insert the floss through the inlet and move it in a sawing motion.
- Continue until the acrylic nail pops off.
Quick Tip: This method can be a little uncomfortable or painful, depending on your threshold. Prepare yourself accordingly and have patience.
Method 6 – Removal Of Acrylic Nails Using A Laminated Business Card

If you are in a hurry to take your acrylic nails off, this is one of the fastest ways to do it. All you have to do is fish out a laminated business card from your purse.
Things You Will Need
- Laminated card
- Orange sticks
Step By Step Process
- Use the orange sticks to pry the edges of the acrylic nails and make a small inlet.
- Slide the laminated business card into the inlet while applying gentle pressure in an upward motion.
- Do this one side at a time to avoid ripping a layer of your actual nail bed. And, the nails should pop right out.
Quick Tip: You can use a debit/credit card instead of a laminated business card for this method.
Important Tips And Precautions To Be Followed While Removing Acrylic Nails
- Under no circumstances, try to yank out your nails forcefully. It might pull out your real nail bed and end up in excruciating pain or infection.
- If you want to try methods that include acetone, make sure there is no fire around you, as acetone is highly flammable.
- In most cases, the side effects of acetone include dehydration of the skin and wrinkling of the skin because it is a potent chemical compound. If you feel a burning sensation or severe redness, do not push your boundaries. Seek professional help immediately.
- Cover the table or the surface on which you do this procedure to safeguard it from acetone stain or damage.
- This process usually takes a long time. Have patience and be seated comfortably in a place for a while.
Once your acrylics are removed, you may find your nails looking dry and unhealthy. But a little TLC can fix that, so do not skip the following steps.
How To Care For Your Nails After Removing Acrylics
- After removing the nail, scrape off the residue of acrylic nails from your nail bed.
- Use a cuticle oil right after you remove the acrylic nails to restore your real nail bed.
- These procedures can be really harsh on the skin, so apply a gentle moisturizer after the process.
- If it has been a while, the tips of your natural nails must have grown out. Trim your real nail tips with a nail clipper.
- As a follow-up treatment, apply nail hardener every day for at least two weeks.
- You might be tempted to get creative with the shape of your nails, but allowing them to grow in their natural shape is essential as it will prevent cracking or breaking.
- Acrylics can weaken your real nails and leave them in need of nourishment. Keep them hydrated with cuticle oil and lotion.
Acrylics are a fun way to jazz up your nails, but they can take a toll on your natural nails. If you are an acrylic junkie, remember these nail care tips to prevent nail damage and keep them in optimal health.
How To Protect Against Acrylic Nail Damage In Future
- After removing your nails, wait for a week to let your real nails restore balance before putting on the next pair of acrylic nails.
- During this break, apply a coat of nail strengthener every day to protect your nails from breakage.
- You can apply cuticle cream and cuticle oil alternatively over your nails and wrap them in warm washcloths for 5 minutes.
Follow these tips diligently to enjoy healthy and shiny nails without worrying about acrylic damage.
Now that you know all the tips and tricks to take acrylics off at home, do not hold yourself back from rocking those killer designer acrylic nails. Go ahead and get your faves without worrying about painful, stressful, and expensive removal methods. Just remember to follow up with a generous dose of strengthening nail treatments.
Acrylic nails can add length to your nails and glamorize your overall look. But they are difficult to remove. However, the above-mentioned simple tips will answer all your questions on how to remove acrylic nails at home. Using acetone, you can remove your acrylic nails easily. Following these tips and precautions while removing acrylic nails can also help you prevent nail damage. Take cues from the listed TLC to maintain the optimal health of your nails. Finally, by following the listed tips, jazz up your nails with acrylics without worrying about damage.
Frequently Asked Questions
Does olive oil remove acrylic nails?
Yes. You may use olive oil instead of cuticle oil to loosen the glue between acrylic and natural nails. Then, soak your nails in a bowl of warm water, acetone, and olive oil for 10-15 minutes to melt the acrylic.
How do you remove acrylic nails with baking soda?
You may soak your nails in a solution of baking soda and toothpaste in warm water for 15-20 minutes to loosen the glue of acrylic nails.
Key Takeaways
- Acrylic nails can glamorize your look, but removing them is difficult.
- You can take off acrylic nails easily at home with acetone.
- You can also remove them using various household items like dental floss or a business card.


