20 Trending Wedding Hairstyles For Black Women For 2022
From braids to buns, these hairstyle ideas for natural hair will glam you up on your big day!
Black weddings are the embodiment of celebration! From jumping the broom, to tasting a mix of vinegar, cayenne, lemon, and honey, black weddings are joyful and vibrant! And just like their incredible traditions, most of the wedding hairstyles for black women have been passed down for ages. Knots, braids, and twists are a part of their deep cultural heritage. These hairstyles flaunt style, edge, and beauty, which is why black women look effortlessly beautiful on their wedding day!
Whether you want an edgy hairstyle or something elegant and intricate, we have some versatile options. Keep reading to check out incredible wedding hairstyle suggestions that you can make your own! Scroll down.
In This Article
20 Stunning Wedding Hairstyles For Black Women
1. The Feed-In Braided Bun

What You Need
- Hair cream, moisturizer or oil
- Rat-tailed comb
- Detangling brush
- Sectioning clips
- Elastic bands to tie the ends OR hot water to seal the ends (depends on whether you are using hair extensions)
- Hair pins
How To Do
- Wash and dry your hair. Detangle it with a brush.
- Use a rat-tailed comb to divide your hair into sections, alternating between 1 cm and 0.5 cm. You’ll have to divide it into sections in a circular motion. This means that you will start from nape of your neck and go all along your hairline.
- Leaving out a 1 cm section in the front, clip up the rest of your hair. Once you’ve clipped the rest of your hair, this thin section will look like a thin mohawk.
- Take a small section of hair from the front of this section and start braiding it in a cornrow. To prevent your hair from being pulled too tightly, apply some hair cream or moisturizer. You can also apply edge cream to prevent flyaways from sticking out.
- As you braid your hair in a cornrow, keep adding hair (if you’re using extensions, add them as well) to it from the sides. You’ll notice that your braid keeps getting bigger as you add hair to it. Keep braiding until you reach the center of your head. Once you reach the center, simply braid your hair upwards and away from the scalp. Do this until you reach the tips of your hair.
- Unclip the next 0.5 cm section of hair and weave this section into a thin cornrow. Don’t add too much hair to it as you want this cornrow to be thin. Once you reach the center of your head, simply braid it till the very end.
- Keep alternating between thick and thin cornrows until you’ve braided all your hair.
- All your braids will now be hanging loosely at the crown. Secure the ends of all your braids with elastic bands or dip the ends in hot water to seal them. Dry your hair with a towel.
- Wrap all the braids together in a bun at the top of your head. Tuck the ends within the bun. Secure them in place using hair pins. Accessorize as needed.
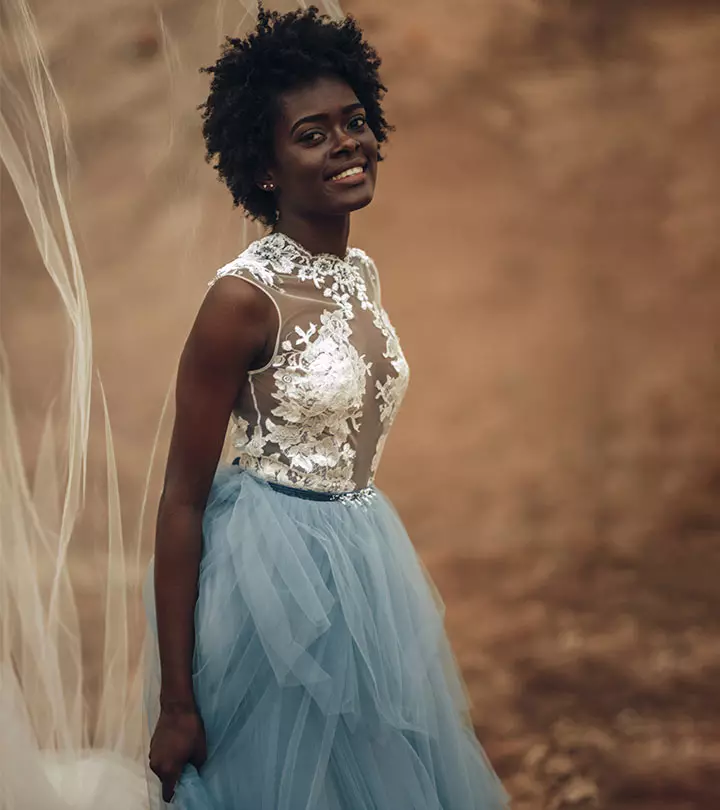
2. Natural Curls

What You Need
- Curl defining cream
- Blow drier
- Silk scarf
- Hair oil
- Hair extensions
How To Do
- Microwave the hair oil for a few seconds and apply it to your hair thoroughly. Use a hair oil that is specifically made for kinky hair. Leave it on for an hour.
- If you don’t have thick hair, consider going for a weave. Before weaving on the extensions, soak them in a mix of apple cider vinegar and water. This will get rid of all lye and prevent scalp irritation.
- Wash your hair and blow dry it on a low setting.
- Apply curl defining cream and wrap your hair up in the silk scarf. Leave it on overnight.
- You’ll have incredibly curly hair the next day.
3. Traditional Black Braids

What You Need
- Hair cream, hair moisturizer or oil
- Rat-tailed comb
- Hair brush
- Hair extensions
- Sectioning clips
- Elastic bands to tie the ends OR hot water to seal the ends
How To Do
- Wash your hair and allow it to air-dry. Apply some hair cream or moisturizer to make it easier to braid your hair. You can also apply some edge cream to smoothen down any frizz or flyaways.
- There are many black braid hairstyles that you can try out, ranging from goddess braids to tree braids. They all require the same hair tools listed above. For detailed instructions on how to weave your hair in any of these traditional protective styles, check out this article.
- Accessorize your hair with beautiful decorative hair pins, clips, and beads.
4. Beachy Waves

What You Need
- Heat protectant
- Straightening iron
- Hairspray
How To Do
- Wash your hair and dry it with a towel. Don’t dry your hair completely as you need it to be damp.
- Spritz on some heat protectant all over your hair.
- Picking up 3-inch wide sections of hair at a time, create waves with the help of a straightening iron. Place the top of the section in the straightening iron and wrap it around once. After 5 seconds, gently pull the straightening iron down till the end of the section while keeping the hair wrapped around it.
- Spritz on some hairspray to keep it looking gorgeous until the end of the day.
5. Twisted Halo

What You Need
- Elastic headband
- Flowers (fresh or artificial)
- Hair pins
How To Do
- Part your hair either down the middle or on one side.
- Put the headband around the crown of your head. Don’t pull your hair out through the headband. It should hang loose under the headband.
- Starting from the front, pick up a 2-inch section of hair, twist it a couple of times, and pass it over and through the headband.
- Keep adding more hair to this section of hair, twisting it, and passing it through the headband until you reach the nape of your neck.
- Repeat the process on the other side.
- Pancake the twists to make them look more voluminous.
- Accessorize the updo by pinning some flowers in place.
6. Side Swept Afro

What You Need
- Rat-tailed comb
- Brush
- Blowdryer
- Hair pins
- Hair oil
How To Do
- Brush your hair out after washing it.
- Blow dry your hair while stretching it out with your fingers.
- Apply a little bit of oil to add shine to your hair.
- Using the rat-tailed comb, part your hair in a deep side parting.
- Sweep all your hair to that side.
- Pin down the hair on the other side.
7. Elegant Messy Bun

What You Need
- Elastic band
- Hair pins
- Decorative hair pins
How To Do
- Comb your hair back using your fingers.
- Wrap your hair in a low bun and secure it with an elastic band and some hair pins.
- Accessorize it with some decorative hair pins.
8. Stretched Out Hair

What You Need
- Blow dryer
- Brush
- Heat protectant
- Oil
- Rat-tailed comb
- Baby’s-breath flowers
How To Do
- Wash your hair and brush it out.
- Spritz some heat protectant all over your hair.
- Blow dry your hair on a medium setting while using your fingers to stretch it out.
- Apply some oil to your hair to give it some shine.
- Part your hair on one side using a rat-tailed comb.
- Accessorize your hair with a few sprigs of baby’s-breath flowers.
9. Faux Mohawk

What You Need
- Elastic bands
- Rat-tailed comb
- Hair pins
- A string of pearls/beads
How To Do
- Using a rat-tailed comb, divide your hair into four sections, forming a top section, two middle sections, and a bottom section.
- Comb all your hair towards the center and tie each section into a ponytail. Make sure to leave some hair on the sides, except at the top and bottom of your head. Now, you have four ponytails at the center.
- Apply some hair cream to the loose sections of hair. Braid these small sections of hair into thin cornrows, starting from your hairline and moving towards the ponytails.
- Pin the cornrows under the ponytails.
- Using hair pins, connect all the ponytails to form a faux mohawk.
- Accessorize the faux mohawk with a string of pearls/beads.
10. Blow Dry Straight Hair

What You Need
- Leave-in conditioner
- Hair brush
- Blow dryer
- Heat protectant
- Silk press straightener
How To Do
- Wash your hair and allow it to air-dry partially. You want your hair to be damp, not wet.
- Brush down your hair from the top to the bottom as you blow dry it. Hold your hair at the bottom with the brush for a few seconds to stretch it out and make it straight.
- Blow dry all your hair this way.
- Apply a heat protectant all over your hair.
- Straighten your hair with a silk press straightener to finish off the look. You can apply a smoothening serum at the end to add more shine.
11. The Half Top Knot

What You Need
- Comb
- Elastic band
- Hair pins
- Hair accessories like small beads and flowers
How To Do
- You will need to straighten your hair before doing this hairstyle.
- Comb your hair to remove all knots and tangles.
- Pick up hair from the top of your head and hold it as you would a half ponytail.
- Take the elastic band and pass it over the half ponytail once. Twist the band and pull the ponytail halfway through it. This will create the base for your top knot.
- Wrap the rest of the ponytail loosely around the base of your top knot and pin it in place.
- Comb the rest of your hair neatly. Pull out some strands of hair in the front to frame your face.
- Accessorize the top knot with simple accessories like small beads, flowers, or hair rings.
12. The Messy Braid

Shutterstock
What You Need
- Comb
- Elastic band (thin)
How To Do
- You will need to straighten your hair before you do this hairstyle.
- Part your hair as you naturally would and sweep all your hair to one side.
- Begin weaving your hair in a loose three-strand braid. If you want something fancier, you can even go for a fishtail braid or a four-strand braid. Let the ends of your hair stick out from the braid to make it look messy.
- Secure the end of the braid with a thin elastic band. Make sure it’s the same color as your hair.
- Pancake the braid to give it a messy boho feel. Allow some hair to fall out from the front and frame your face.
13. Tapered Pixie Bob

Shutterstock
What You Need
- Round brush
- Blow dryer
- Hairspray
How To Do
- Start off with damp hair and part your hair on one side.
- Blow dry your hair while brushing it backwards with a round brush.
- Lift your bangs with the round brush and then drop them while blow drying them. This will give your bangs the perfect swoop.
- Finish off with some hairspray to set the do in place.
14. Sleeked Back Ponytail

Shutterstock
What You Need
- Heat proectant
- Silk press straightener
- Elastic band
- Comb
How To Do
- Apply some heat protectant and straighten your hair with a silk press straightener.
- Comb your hair to detangle it.
- Part your hair in a deep side parting.
- Tie all your hair in a low ponytail at the back. Secure it with an elastic band.
15. Spiked Pixie Hairdo

Shutterstock
What You Need
- Comb
- Round brush
- Strong-hold hair gel
How To Do
- Wash and blow dry your hair.
- Apply strong-hold hair gel all over your hair. Cover every strand of your hair with the gel to keep the hairdo intact throughout the day.
- Place the round brush behind a section of hair and comb it upwards and then backwards. Repeat this combing motion all over your hair.
16. One Side Swept Curls

Shutterstock
What You Need
- Heat protectant
- Curling iron
- Hairspray
How To Do
- Spritz on some heat protectant all over your hair.
- Using a curling iron, curl your hair from the middle to the ends. Wrap your hair in big sections within the curler to get nice big curls.
- Gently spritz on some hairspray over your curls to prevent them from unraveling.
- Part your hair on one side.
- Sweep all your hair to one side and pin it down behind your ear on the opposite side.
17. Criss-Cross Bun

What Do Need
- Hair pins
- Braiding hair clip
- Comb
- Accessories of your choice
How To Do
- Begin by combing and detangling your hair.
- Comb the hair in the front backwards. Place one hand on the hair at the top of your head and push it forward slightly. This creates a pouf. Pin your hair to secure the pouf.
- Comb the rest of your hair gently, making sure not to mess up the pouf.
- Divide your hair down the middle – one half on the right side, and one on the left side.
- Insert the braiding hair clip in between the two sections of hair.
- Take some hair from the right side and pass it through the top left clip loop, bringing back the section to the right side.
- Pick up some hair from the left side and repeat the previous step.
- Keep adding hair to the sections as you pass them through the clip until you reach the end of the clip.
- Tuck the rest of your hair within the bun using hair pins.
- Pancake the bun to make it look voluminous.
- Accessorize the hairdo with an elegant comb hair pin.
18. Low Braided Updo

What You Need
- Hair pins
- Comb
- Curling iron
- Hairspray
- Accessories
How To Do
- Using the curling iron, curl your hair from the middle till the ends. You want loose curls and not tight ringlets, so wrap big sections of hair in the iron.
- Allow your hair to cool down before you touch it. It’s a good idea to spritz on some hairspray before and after you curl your hair as it keeps the hairdo intact for a long time.
- Part your hair on one side and pin up your bangs.
- Pick up some hair from the side of the parting with more hair. Weave this section of hair into a regular braid.
- Wrap the rest of your hair in a low bun, allowing the ends to fall out.
- Pin the ends of the braid within the bun, or if your braid is long enough, wrap it around the bun before pinning it down.
- Comb your bangs neatly and accessorize your bun with some light hair decorative pins.
- Finish off with a few spritzes of hairspray to set the updo in place.
19. Kinky Pineapple Ponytail

What Do You Need?
- Curl defining cream
- Elastic band
- Silk scarf
How To Do
- Wash your hair the day before your wedding.
- Apply some curl defining cream to your hair and wrap it in a silk scarf. Leave it on overnight.
- Take off the silk scarf in the morning. You’ll notice your curls have much more definition.
- Bend over and brush all your hair towards the center of your head.
- Using an elastic band, tie your hair at the crown.
- Stand up straight and fluff up your ponytail to finish off the look.
20. Hollywood French Twist

Shutterstock
What You Need
- Hair pins
- Straightening iron
- Heat protectant
- Volumizing spray
- Long hair clip
- Blow dryer
- Round brush
- Comb
How To Do
- If you have curly hair, begin by applying some heat protectant and straightening it.
- Once your hair is straightened, comb your hair neatly. Part your hair on one side and clip up your bangs. If you don’t have bangs, pick a section of hair from the side of the parting with more hair in front, bend it near your forehead, and pin it off to one side.
- Hold out the rest of your hair at the back and pull it to either the right or left side.
- Roll your hair in towards your head. You can place a long clip at the end of your hair and then roll your hair in to keep it neat. However, make sure that the clip is long enough to hold your hair but small enough to not be seen.
- Once your hair is hair is rolled completely, secure it using hair pins.
- Unclip your bangs or the small section of hair from the front. Using a round brush and a blow dryer, style this hair in a swoop.
- Finish off with some hairspray to secure the French twist in place.
Infographic: Hair Care Tips For Type 4 Curls
Your D-day needs to be perfect, and so does your bridal hairstyle. We hope this list can let you be carefree while getting your bridal hair done. But to let your hairstyle stand out, your mane needs to be healthy. For that, you will have to take utmost care of your tresses.
Check out our infographic below and learn the hair care tips curated specially for your hair type.
![hair care tips for style [infographic]](https://cdn2.stylecraze.com/wp-content/uploads/2021/12/Hair_Care_tips_For_Style_4_Curls-01.jpg.webp)
Illustration: StyleCraze Design Team
Black weddings are the epitome of festivity! They are lively and vibrant, from leaping the broom to tasting a mixture of vinegar, pepper, lemon, and honey! And, like their great customs, most black women’s wedding hairstyles have been passed down for generations. Their deep cultural past includes knots, braids, and twists. You can also wear an afro on your wedding day to keep your hair natural. Another option is to relax your hair and style it in beachy waves. These wedding hairstyles for black women exude elegance, edge, and beauty, which is why black brides-to-be look stunning on their wedding day.
Frequently Asked Questions
When should you get a haircut before the wedding?
Getting a haircut about 3 weeks to a month before the wedding is advisable to let it frame your face naturally.
How can I make my wedding hairstyle last all day?
While hair spray, pins, and accessories can help your hairstyle stay in place all day, it’s best not to fuss over it as much and take it easy on your special day.
Can the mother of the bride wear flowers in her hair?
While a corsage is traditionally offered to the bride’s mother, she may also choose to wear flowers in her hair.
Who pays for hair and makeup on the wedding day?
It’s usually the bride’s family who take care of the hair and makeup of the bride and bridesmaids on the wedding day.
How many hours before your wedding should you get your hair done?
That depends on how much time it would take for the hairstyle you opt for and whether you need to visit a salon or you are getting the hairstylist at the venue. Ideally, you should have it done 2-3 hours before the event to give you ample breathing time.
Should a bride wear her hair up or down?
It is her own choice and decision to style her hair and wedding dress as per her desire for her special day.
Key Takeaways
- Wedding hairstyles centered around knots, braids, and twists are great options for Black women.
- You can also leave your hair natural and rock an afro on your wedding day.
- Getting your hair relaxed and styling it in beachy waves is another way to go.


