20 Best Hairstyles For Brides With Round Faces
Choose from these exquisite styles that will frame your face gracefully on your big day.
If you have a round face, you know the time and effort it takes to search for hairstyles that make your face look thinner rather than wide. It can be very irritating, especially for those special days you want to look like a goddess, like your wedding day. So, we made a list of the best bridal hairstyles for round faces.
Imagine this, you are asleep, dreaming of your wedding day. You have the perfect flowing wedding dress, your shoes (although hidden) look glamorous, but you feel your hair sticking to your face making its round shape all the more evident! *Gasp* You want a hairstyle that cuts the width of your face shape, enhances your facial features, and highlights your makeup. Instead of looking rounder, your hairstyle should make your face look leaner and longer.
While it may sound impossible, it is pretty easy to achieve with the right hairstyle! So keep reading to check out some shape-altering hairstyles to make your round face look even better! But first, do you know if you have a round face? Keep reading to find out!
In This Article
How To Know If You Have A Round Face
- Measure the widths of your forehead, cheeks, and jawline.
- Measure the length from your hairline to the tip of your chin.
- If the broadest width is equal to the length of your face, you have a round face.
- Also, your jawline will be soft and round rather than angular.
Now that you’ve determined your face is indeed a round shape, here are a few pointers to keep in mind.
Keys To Picking A Good Hairstyle For Round Faces
- Bangs make a round face appear slender by framing the face. Front bangs, tapered bangs, side bangs, and side swept bangs take away width from the forehead and give your face more definition.
- Long straight hair with layers works like magic for women with round faces. The layers add focus to the jawline, giving it more structure.
- Long full curls and waves are excellent choices for round faces. The full curls and waves add volume to the hair, giving your face a thin appearance.
- If you’re going for a short hairstyle, try the textured lob. Let the back be short, and the front should be at or below the jawline.
- If you’re considering a bun, go for a bun with layers as that will add volume to your hair and make your face look slim.

Here are a few things you need to avoid.
What To Avoid When Picking A Hairstyle For A Round Face
- Avoid blunt haircuts (the entire hair being the same length) without a fringe as they make your face look larger than it is.
- Choose short hairstyles at your own risk. I’m not saying that short hairstyles are bad for women with round faces, but they might not suit all. If you have a thin round face, a short hairstyle will look good. Really short hairstyles are a no-no for round-faced women.
- Frizzy hair will not look great on a round face. Either go straight or have full curls or full waves. Avoid zig-zag hair as well.
I have put together a list of 20 bridal hairstyles, along with a few hairdo maintenance tips and pre-night hair prep tips, so you don’t have to worry about your hair on D-day!
20 Best Bridal Hairstyles For Round Faces
The primary trend in bridal hairstyles is a stylish bun, a cool braid, or leaving your hair down. Chignon hairstyles are also trending right now.
For your benefit, I’ve added 10 DIY styles within the 20 – so you can try them out yourself and see which one suits you best. Try out all these hairstyles at least two months before your wedding to pick the one that looks the best.
Here are 10 DIY bridal hairstyles that look stunning.
1. The Elegant Bun

Shutterstock
What You Need
- Clips
- Thin elastic bands
- Donut bun band
- Hair pins
- A string of pearls
Note: Make sure the hair pins, donut bun band (or chignon bun), and elastic bands are the same color or the closest similar color to your hair.
Procedure
- Split your hair into three sections, with the center section being the biggest. Clip the sides away. Tie the center section into a high ponytail.
- Lift your ponytail and place the donut band underneath it using hair pins. Pull the ponytail down and arrange the hair over the donut band to cover it. Secure it in place with an elastic band.
- Take the loose hair from one side and carefully merge it with the lower ponytail by folding it under the ponytail. Hold it in place with a hair pin, and allow the rest of the hair to blend with the center section of hair.
- Take the last section of hair and blend it with the hair in the center. Wrap it around the chignon bun, and just before the ends, pin it up with hair pins to hold it in place. Accessorize it with a string of pearls.
2. Simple Side Braid

Shutterstock
What You Need
- Curling iron
- Hairspray
- Elastic band
Procedure
- Start braiding your hair from the side, leaving just a little hair for a side fringe.
- While braiding, keep adding hair until your entire hair is in the side braid.
- Carefully loosen the braid by pulling on the hair.
- Take the side fringe and curl it using a curling iron. Spritz it with hairspray.
- Accessorize with pearls and flowers.
3. The Two Rose Bun

Shutterstock
What You Need
- Elastic bands
- Rat tail comb
- Hair pins
- Clips
Procedure
- Split your hair diagonally into two sections and clip the section with the most hair on top.
- Braid the lower section till the end and tie an elastic band around it.
- Loosen the braid carefully with small tugs on the hair.
- Repeat the same for the top section.
- Fold the first section into a bun on the top and pin it in place. Fold the bun flat so it looks like a rose.
- Fold the next section into a bun at the bottom and pin it in place.
4. The Side Accent Braid With Curls

Shutterstock
What You Need
- Rat tail comb
- Elastic bands
- Hair pins
- Chignon bun maker or donut bun band
Procedure
- Take a side parting and then take about an inch of the side and braid it loosely.
- Pull the braid and loosen it more.
- Pin it in place.
- You can accessorize and leave this hairstyle the way it is. Or you can bun your entire hair.
- Take all your hair and tie it in a mid-ponytail.
- Take a chignon bun maker or a donut bun band and place it underneath the ponytail.
- Let the ponytail fall over the bun maker. Arrange it, so you don’t see any part of the bun maker.
- Tie a ponytail after that to hold it in place.
- Now, depending on the amount of hair left, you can twirl the remaining hair around the bun and pin it up just before it ends, tucking the rest underneath.
- Accessorize it.
5. The French Braid Bun

Shutterstock
What You Need
- Comb
- Elastic band
- Hair pins
Procedure
- Flip your hair over and in front of you. Start French braiding your hair from the nape of your neck and stop midway.
- Tie it into a high ponytail and then twirl it into a neat bun.
- Hold it in place with hairpins.
- Accessorize.
6. The Curly Bun

Shutterstock
What You Need
- Hair pins
- Section clips
- Rat tail comb
Procedure
- Tie up all the hair at the crown.
- Part the rest of your hair in two halves.
- Twist one half, pin it up halfway in the middle, and leave the rest of the hair. Do the same with the other half.
- Take the top portion of hair and start twisting it from halfway down. Keep it in place with a pin. Now, arrange the ends of all the three fractions neatly so that the curls at the ends can be seen.
- Accessorize it.
7. Cascade Braids

Shutterstock
What You Need
- Curling iron
- Hair pins
- Section clips
- Hairspray
Procedure
- If your hair isn’t curly, use a curling iron.
- Take an inch of hair from the top. Split it into three parts and start a standard braid. Take one side over the middle section, then pass the other side over the middle section. Now, drop the middle section.
- Take a part of hair from your loose hair to make that the middle section. While taking one side over the middle section, add some hair to it from the top. Take the other section over the middle section and drop the middle section.
- Keep repeating this until you reach the other side.
- Pin your hair up with a suitable accessory.
8. Side Braids With A Bun

Shutterstock
What You Need
- Rat tail comb
- Hair pins
- Elastic band
Procedure
- Take a majority of your hair, leaving about 2-2 ½ inches. Bun the majority off neatly. You can do any bun – a donut bun, a neat bun, or a messy bun.
- Take one side section of hair and braid it. Pin it to the bun neatly.
- Do the same with the other side section.
- Accessorize it.
9. The Twist And Fold

Shutterstock
What You Need
- Thin, plain colored headband
- Rat tail comb
- Hair pins
- Elastic band
Procedure
- Take a simple thin headband and place it on your head around the crown.
- Split your hair from the bottom into three parts, making the middle section the largest, and the other two sections the same width.
- Tie the middle section in a ponytail about 2-3 inches above the ends.
- Flip it up and fold it under the headband. You can leave it loose or add a donut bun band or a chignon bun maker before you fold it in.
- Use hair pins to keep it in place.
- Take one side section and twist it, so it follows along the top of the bun. Pin it in place.
- Do the same with the other side.
- Accessorize it.
10. The Braided Bun

Shutterstock
What You Need
- Elastic bands
- Hair pins
Procedure
- Tie your hair up in a high ponytail, leaving some side swept hair to use as a fringe.
- Split your hair into three equal sections.
- Braid the middle section in a fishtail braid. Keep tugging at the braid as you go, making it a loose fishtail braid.
- Repeat the same with the other two sections.
- Take the right side braid and roll it around the ponytail, underneath the other braids. This forms the first layer of the bun.
- Take the left side braid and roll it around the ponytail over the right braid neatly. This is the second layer of the bun.
- Take the middle braid and roll it around the other two braids, forming a full bun.
- Accessorize it.
Here are 10 other bridal hairstyles that are just too awesome to miss out.
11. Curls

You can either pin or tie your hair in a loose pony. If you pin your hair, pin each curl in place to make your hair look fuller. If you tie your hair in a ponytail, tie the elastic band tightly, and fluff up the loose hair make it appear thicker.
12. The French Twist

Shutterstock
This hairstyle is a French twist bun. It is done by twirling your hair up into a bun and tucking the remaining hair in the bun.
13. Folded Layers

Shutterstock
Section your hair into parts of 1 inch width. Starting at the bottom, take the first section and fold it in a curve, pinning the end up. Keep doing this with all the sections. As you go higher, your folds will become smaller. Take the last side section and twist it and pin it in place.
14. Side Swept Centerfold Hair

Shutterstock
This hairdo involves folding your hair and then sweeping it to one side. You can use a braid maker to help you get loose folds or go to a hairstylist and get it done.
15. Loose Half Braid

Shutterstock
This is an elegant hairstyle that is perfect for all face shapes. Very loosely, braid the top of your hair into a fishtail braid. Tie it halfway (right at the ears) with an elastic band. Now, take about an inch of hair from the side and roll it over the elastic band. Fluff your hair to add volume.
16. Slight Pompadour Bun With A Twist

Shutterstock
This is a graceful pompadour bun with curls at the end. The pompadour at the top adds height to the hair, which gives your face an elongated look.
17. Side-Swept Bangs With A Neat Bun

Shutterstock
The bun with side swept up bangs looks impressive on round faces. The side swept bangs not only take away focus from your forehead but also add horizontal attention to your face, focusing on your eyes.
18. The Boho Braid

Shutterstock
A boho braid is a stunning bridal hairstyle. It is very graceful and pretty. Make sure that your braid is loose with some hair dropping on your face. This will make your hair look thicker. You can play around with the boho braid by braiding just the center top hair.
19. The Knotted Bun

Shutterstock
A knotted bun looks good on women with round faces. But make sure the knotted bun is big, and allow some hair to fall on your face.
20. The Loose Messy Bun

Shutterstock
The added height of this hairstyle at the top makes your face look long. The loose hair falling on your face makes it look slim.
These 20 hairstyles will work for you – whether you have your hair covered or left uncovered. If you decide to go au naturel, remember to have some loose hair fall on your face.
Here are some hair care tips to help you prep for the D-day.
Hair Care And Maintenance
- Start your hair care regimen at least two to three months before your wedding day.
- Use a blend of castor oil and coconut oil to get voluminous hair.
- Deep condition your hair at least three times a week.
- Shampoo your hair on alternate days.
- Use a conditioner regularly as that will moisturize your hair and keep it luscious.
Some hairstylists will ask you to wash your hair while others will do it for you on the day of the wedding. So, find out what your hairstylist prefers. If your hairstylist has asked you to wash your hair, follow these steps the night before the wedding day:
- Massage your hair with warm oil and leave it on for 1-2 hours.
- Wash your hair first when you go for a bath. After that, deep condition your hair and cover it with a shower cap.
- Allow your hair to air dry.
You can also use accessories to amp up your hairstyle. Here are a few ideas.
Accessories

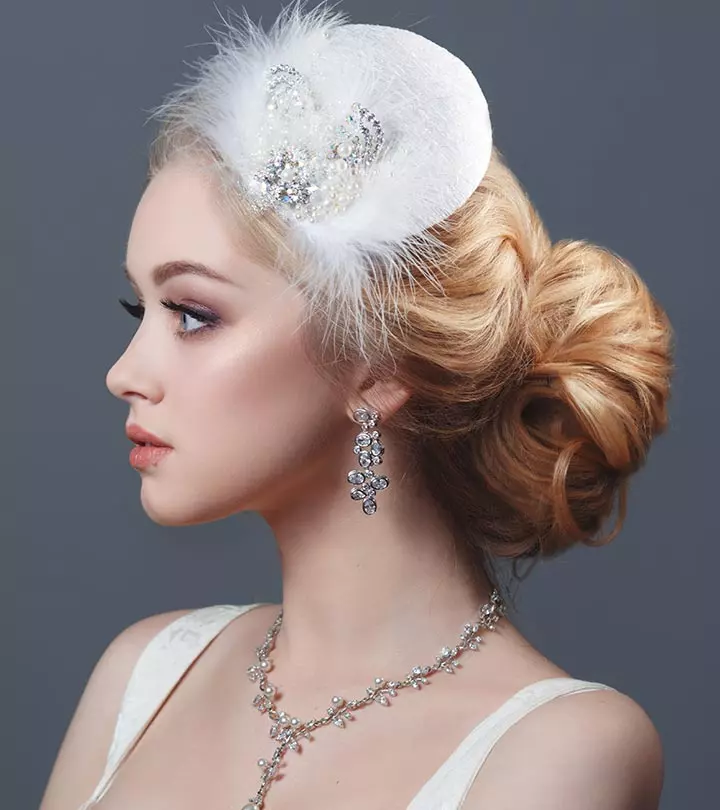
- Real flowers look gorgeous on any hairstyle. They add a delicate and beautiful touch.

Shutterstock
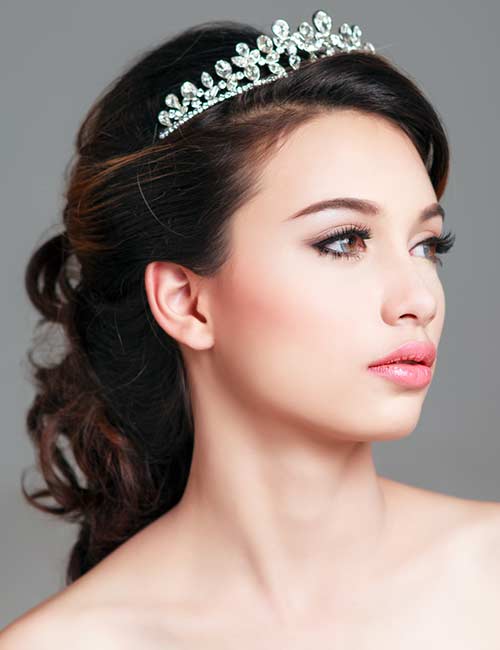
- Nothing says ’bride’ like a tiara! It is guaranteed to make you feel like a queen!

Shutterstock
- A flower wreath is a great way to make a simple hairdo look beautiful.

- Beads and pearls give hairstyles a rich look.

Shutterstock
- A bejeweled clip is a great hair accessory. It looks stunning!

- A long simple bijouterie can turn a simple bun into a masterpiece.

- Big flowers are simple yet breathtaking!

- A blend of big and small bijouteries makes your hair look classy.

Shutterstock
- A veiled hat will make your bridal look very stylish.

Shutterstock
- A simple and small bijouterie adds the right amount of beauty to your bridal look.
People with a round face shape know how hard it is to choose a hairstyle that gives your face a slender and longer appearance. While it may sound impossible, the right hairstyle can make you look like a princess on your special day. You can go for the elegant bun or the boho braid for a stunning look. Avoid blunt or short hairstyles as they can make your face look rounder. With a proper hair care routine and accessories, your hair will look gorgeous and healthy on your wedding day.


